Hello Friends.....
In this article I will teach you how to build a simple database application using WPF that can display data in GridView and can perform ADD, UPDATE and DELETE operations on SQL server database .
In this article I will teach you how to build a simple database application using WPF that can display data in GridView and can perform ADD, UPDATE and DELETE operations on SQL server database .
In this article I will teach you how to build a simple database application using WPF that can display data in GridView and can perform ADD, UPDATE and DELETE operations on SQL server database .as many of users new to WPF don’t know how to make such application because data binding in WPF is somewhat different in WPF than windows Form application.
Here is screenshot what we are going to build in this article.


Technology
C# WPF framework 3.5/4.0
Implementation
We are going to build a sample database application shown in screenshot as above. So first step to start a new WPF project
Visual Studio >> File >> New >> Project >>WPF Application
Now setup the GUI as shown in screen shot
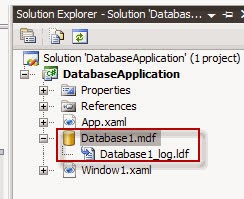
Now we completed to setup GUI .now we have to design a database for our application. So let’s add database to our application as below and add database in our solution.

<ListView.View>
<GridView>
<GridViewColumn Header="ID" DisplayMemberBinding="{Binding Path=ID}"></GridViewColumn>
<GridViewColumn Header="Username" DisplayMemberBinding="{Binding Path=Username}"></GridViewColumn>
<GridViewColumn Header="Password" DisplayMemberBinding="{Binding Path=Password}"></GridViewColumn>
</GridView>
</ListView.View>
</ListView> Note the highligted code here that’s is used for databinding we mentioned ItemSource =”{Binding}” And columns having same type of code mentioning which field we want to display into the gridViewColumn We done data binding to our listview now next task is when user clicks any item in listview item data should be displyed into the corresponding textboxes. For that we need to bind those texbox Text Property to the listview ‘s selected item .We will do this by below XAML code. <TextBox Margin="92,81,145,96" Name="textBox1" DataContext="{Binding ElementName=listView1,Path=SelectedItem}" Text="{Binding Path=Username}" Grid.ColumnSpan="2" Grid.Row="1" /> <TextBox Height="23" Margin="92,0,145,65" Name="textBox2" VerticalAlignment="Bottom" DataContext="{Binding ElementName=listView1,Path=SelectedItem}" Text="{Binding Path=Password}" Grid.ColumnSpan="2" Grid.Row="1" /> <Label Margin="16,81,53,96" Name="label1" Grid.Row="1">Username :</Label> <Label Height="21" Margin="16,0,53,65" Name="label2" VerticalAlignment="Bottom" Grid.Row="1">Password :</Label> Note here in textbox we are specifiying DataContext too ..,, as now for textbox as master source we have listview’s selected item and in Text property DataBinding we are mentioning what item to be displyed in Text out of that DataContext data … Now our mejor task is completed now we need to work with cshap code to Provide DataTable to be displayed by it For showing data we will code Function ShowData() as below
And we will call this funtion on Window_Loaded() event ..
We designed out UserData Table As below

Note here that ID column is auto incrementing by 1 in UserData table
Now we have completed database table creation now let’s move to code.
In this application we will fist create appropriate GUI using XAML code .we have taken one ListBox Control when we built gui form when we show our data into it we need columns to be added into it .We can do this like below code
<ListView Margin="8,9,11,125" Name="listView1" ItemsSource="{Binding}" MinWidth="250" MinHeight="100" Grid.ColumnSpan="2"
Grid.RowSpan="2">
<GridView>
<GridViewColumn Header="ID" DisplayMemberBinding="{Binding Path=ID}"></GridViewColumn>
<GridViewColumn Header="Username" DisplayMemberBinding="{Binding Path=Username}"></GridViewColumn>
<GridViewColumn Header="Password" DisplayMemberBinding="{Binding Path=Password}"></GridViewColumn>
</GridView>
</ListView.View>
</ListView> Note the highligted code here that’s is used for databinding we mentioned ItemSource =”{Binding}” And columns having same type of code mentioning which field we want to display into the gridViewColumn We done data binding to our listview now next task is when user clicks any item in listview item data should be displyed into the corresponding textboxes. For that we need to bind those texbox Text Property to the listview ‘s selected item .We will do this by below XAML code. <TextBox Margin="92,81,145,96" Name="textBox1" DataContext="{Binding ElementName=listView1,Path=SelectedItem}" Text="{Binding Path=Username}" Grid.ColumnSpan="2" Grid.Row="1" /> <TextBox Height="23" Margin="92,0,145,65" Name="textBox2" VerticalAlignment="Bottom" DataContext="{Binding ElementName=listView1,Path=SelectedItem}" Text="{Binding Path=Password}" Grid.ColumnSpan="2" Grid.Row="1" /> <Label Margin="16,81,53,96" Name="label1" Grid.Row="1">Username :</Label> <Label Height="21" Margin="16,0,53,65" Name="label2" VerticalAlignment="Bottom" Grid.Row="1">Password :</Label> Note here in textbox we are specifiying DataContext too ..,, as now for textbox as master source we have listview’s selected item and in Text property DataBinding we are mentioning what item to be displyed in Text out of that DataContext data … Now our mejor task is completed now we need to work with cshap code to Provide DataTable to be displayed by it For showing data we will code Function ShowData() as below
public void ShowData()
{
SqlConnection con = new SqlConnection(@"Data Source=.\SQLEXPRESS;AttachDbFilename=|DataDirectory|\Database1.mdf;Integrated Security=True;User Instance=True");
con.Open();
SqlCommand comm = new SqlCommand("Select * from userdata", con);
DataTable dt = new DataTable();
SqlDataAdapter da = new SqlDataAdapter(comm);
da.Fill(dt);
listView1.DataContext = dt.DefaultView;
}
And we will call this funtion on Window_Loaded() event ..
private void Window_Loaded(object sender, RoutedEventArgs e)
{
ShowData();
}
so that data will be shown in listview when application runs.
Now what about that buttons for performing DELETE UPDATE INSERT operation ??
Well its code is same like windows Application here is the code for performing this task
private void btnAdd_Click(object sender, RoutedEventArgs e)
{
string Username = textBox1.Text;
string password = textBox2.Text;
SqlConnection con = new SqlConnection(@"Data Source=.\SQLEXPRESS;AttachDbFilename=|DataDirectory|\Database1.mdf;Integrated Security=True;User Instance=True");
con.Open();
SqlCommand comm = new SqlCommand("insert into userdata(username,password) values(@username,@password)", con);
comm.Parameters.AddWithValue("@username", textBox1.Text);
comm.Parameters.AddWithValue("@password", textBox2.Text);
comm.ExecuteNonQuery();
con.Close();
ShowData();
}
private void btnClear_Click(object sender, RoutedEventArgs e)
{
textBox1.Text = "";
textBox2.Text = "";
}
public void ShowData()
{
SqlConnection con = new SqlConnection(@"Data Source=.\SQLEXPRESS;AttachDbFilename=|DataDirectory|\Database1.mdf;Integrated Security=True;User Instance=True");
con.Open();
SqlCommand comm = new SqlCommand("Select * from userdata", con);
DataTable dt = new DataTable();
SqlDataAdapter da = new SqlDataAdapter(comm);
da.Fill(dt);
listView1.DataContext = dt.DefaultView;
}
private void btnDelete_Click(object sender, RoutedEventArgs e)
{
if (listView1.SelectedItems.Count > 0)
{
DataRowView drv = (DataRowView)listView1.SelectedItem;
string id = drv.Row[0].ToString();
SqlConnection con = new SqlConnection(@"Data Source=.\SQLEXPRESS;AttachDbFilename=|DataDirectory|\Database1.mdf;Integrated Security=True;User Instance=True");
con.Open();
SqlCommand comm = new SqlCommand("delete from userdata where id=@id", con);
comm.Parameters.AddWithValue("@id", id);
comm.ExecuteNonQuery();
ShowData();
}
}
private void btnUpdate_Click(object sender, RoutedEventArgs e)
{
if (listView1.SelectedItems.Count > 0)
{
DataRowView drv = (DataRowView)listView1.SelectedItem;
string id = drv.Row[0].ToString();
SqlConnection con = new SqlConnection(@"Data Source=.\SQLEXPRESS;AttachDbFilename=|DataDirectory|\Database1.mdf;Integrated Security=True;User Instance=True");
con.Open();
SqlCommand comm = new SqlCommand("update userdata set username=@username,password=@password where id=@id", con);
comm.Parameters.AddWithValue("@id", id);
comm.Parameters.AddWithValue("@username", textBox1.Text);
comm.Parameters.AddWithValue("@password", textBox2.Text);
comm.ExecuteNonQuery();
con.Close();
ShowData();
}
}
We are done !! we builded small application with INSERT UPDATE DELETE fuctionality in WPF .
Conclusion
I am a passionate programmer and a Software Engineer love blogging and developing applications in Microsoft Technologies.
ConversionConversion EmoticonEmoticon